Popover
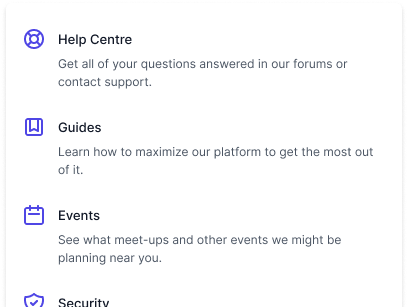
Popovers are perfect for floating panels with arbitrary content like navigation menus, mobile menus and flyout menus.
To get started, install Headless UI via npm.
Please note that this library only supports Vue 3.
npm install @headlessui/vue
Popovers are built using the Popover, PopoverButton, and PopoverPanel components.
Clicking the PopoverButton will automatically open/close the PopoverPanel. When the panel is open, clicking anywhere outside of its contents, pressing the Escape key, or tabbing away from it will close the Popover.
<template>
  <Popover class="relative">
    <PopoverButton>Solutions</PopoverButton>

    <PopoverPanel class="absolute z-10">
      <div class="grid grid-cols-2">
        <a href="/analytics">Analytics</a>
        <a href="/engagement">Engagement</a>
        <a href="/security">Security</a>
        <a href="/integrations">Integrations</a>
      </div>

      <img src="/solutions.jpg" alt="" />
    </PopoverPanel>
  </Popover>
</template>

<script setup>
  import { Popover, PopoverButton, PopoverPanel } from '@headlessui/vue'
</script>
These components are completely unstyled, so how you style your Popover is up to you. In our example we're using absolute positioning on the PopoverPanel to position it near the PopoverButton and not disturb the normal document flow.
Headless UI keeps track of a lot of state about each component, like which listbox option is currently selected, whether a popover is open or closed, or which item in a popover is currently active via the keyboard.
But because the components are headless and completely unstyled out of the box, you can't see this information in your UI until you provide the styles you want for each state yourself.
Each component exposes information about its current state via slot props that you can use to conditionally apply different styles or render different content.
For example, the Popover component exposes an open state, which tells you if the popover is currently open.
<template><Popover v-slot="{ open }"><!-- Use the `open` state to conditionally change the direction of the chevron icon. --> <PopoverButton> Solutions<ChevronDownIcon :class="{ 'rotate-180 transform': open }" /></PopoverButton> <PopoverPanel> <a href="/insights">Insights</a> <a href="/automations">Automations</a> <a href="/reports">Reports</a> </PopoverPanel> </Popover> </template> <script setup> import { Popover, PopoverButton, PopoverPanel } from '@headlessui/vue' import { ChevronDownIcon } from '@heroicons/vue/20/solid' </script>
For a complete list of all the available slot props, see the component API documentation.
Each component also exposes information about its current state via a data-headlessui-state attribute that you can use to conditionally apply different styles.
When any of the states in the slot prop API are true, they will be listed in this attribute as space-separated strings so you can target them with a CSS attribute selector in the form [attr~=value].
For example, here's what the Popover component renders when the popover is open:
<!-- Rendered `Popover` -->
<div data-headlessui-state="open">
  <button data-headlessui-state="open">Solutions</button>
  <div data-headlessui-state="open">
    <a href="/insights">Insights</a>
    <a href="/automations">Automations</a>
    <a href="/reports">Reports</a>
  </div>
</div>
If you are using Tailwind CSS, you can use the @headlessui/tailwindcss plugin to target this attribute with modifiers like ui-open:*:
<template> <Popover> <PopoverButton> Solutions<ChevronDownIcon class="ui-open:rotate-180 ui-open:transform" /></PopoverButton> <PopoverPanel> <a href="/insights">Insights</a> <a href="/automations">Automations</a> <a href="/reports">Reports</a> </PopoverPanel> </Popover> </template> <script setup> import { Popover, PopoverButton, PopoverPanel } from '@headlessui/vue' import { ChevronDownIcon } from '@heroicons/vue/20/solid' </script>
By default, your PopoverPanel will be shown/hidden automatically based on the internal open state tracked within the Popover component itself.
<template>
  <Popover>
    <PopoverButton>Solutions</PopoverButton>
    <!--
      By default, the `PopoverPanel` will automatically show/hide
      when the `PopoverButton` is pressed.
    -->
    <PopoverPanel>
      <!-- ... -->
    </PopoverPanel>
  </Popover>
</template>

<script setup>
  import { Popover, PopoverButton, PopoverPanel } from '@headlessui/vue'
</script>
If you'd rather handle this yourself (perhaps because you need to add an extra wrapper element for one reason or another), you can pass a static prop to the PopoverPanel to tell it to always render, and then use the open slot prop to control when the panel is shown/hidden yourself.
<template><Popover v-slot="{ open }"><PopoverButton>Solutions</PopoverButton> <div v-if="open"><!--Using the `static` prop, the `PopoverPanel` is alwaysrendered and the `open` state is ignored.--> <PopoverPanel static> <!-- ... --> </PopoverPanel> </div> </Popover> </template> <script setup> import { Popover, PopoverButton, PopoverPanel } from '@headlessui/vue' </script>
Since popovers can contain interactive content like form controls, we can't automatically close them when you click something inside of them like we can with Menu components.
To close a popover manually when clicking a child of its panel, render that child as a PopoverButton. You can use the :as prop to customize which element is being rendered.
<template> <Popover> <PopoverButton>Solutions</PopoverButton> <PopoverPanel><PopoverButton :as="MyLink" href="/insights">Insights</PopoverButton><!-- ... --> </PopoverPanel> </Popover> </template> <script setup> import { Popover, PopoverButton, PopoverPanel } from '@headlessui/vue' import MyLink from './MyLink' </script>
Alternatively, Popover and PopoverPanel expose a close() slot prop which you can use to imperatively close the panel, say after running an async action:
<template> <Popover> <PopoverButton>Solutions</PopoverButton><PopoverPanel v-slot="{ close }"><button @click="accept(close)">Read and accept</button></PopoverPanel></Popover> </template> <script setup> import { Popover, PopoverButton, PopoverPanel } from '@headlessui/vue'async function accept(close) {await fetch('/accept-terms', { method: 'POST' })close()}</script>
By default the PopoverButton receives focus after calling close(), but you can change this by passing a ref into close(ref).
If you'd like to style a backdrop over your application UI whenever you open a Popover, use the PopoverOverlay component:
<template> <Popover v-slot="{ open }"> <PopoverButton>Solutions</PopoverButton><PopoverOverlay class="fixed inset-0 bg-black opacity-30" /><PopoverPanel> <!-- ... --> </PopoverPanel> </Popover> </template> <script setup> import { Popover, PopoverOverlay, PopoverButton, PopoverPanel, } from '@headlessui/vue' </script>
In this example, we put the PopoverOverlay before the Panel in the DOM so
that it doesn't cover up the panel's contents.
But like all the other components, PopoverOverlay is completely headless, so
how you style it is up to you.
To animate the opening/closing of your Popover's panel, you can use Vue's built-in <transition> element. All you need to do is wrap your PopoverPanel in a <transition>, and the transition will be applied automatically.
<template> <Popover> <PopoverButton>Solutions</PopoverButton> <!-- Use the built-in `transition` component to add transitions. --><transitionenter-active-class="transition duration-200 ease-out"enter-from-class="translate-y-1 opacity-0"enter-to-class="translate-y-0 opacity-100"leave-active-class="transition duration-150 ease-in"leave-from-class="translate-y-0 opacity-100"leave-to-class="translate-y-1 opacity-0"><PopoverPanel> <!-- ... --> </PopoverPanel> </transition> </Popover> </template> <script setup> import { Popover, PopoverButton, PopoverPanel } from '@headlessui/vue' </script>
If you'd like to coordinate multiple transitions for different children of your Popover, check out the Transition component included in Headless UI.
When rendering several related Popovers, for example in a site's header navigation, use the PopoverGroup component. This ensures panels stay open while users are tabbing between Popovers within a group, but closes any open panel once the user tabs outside of the group:
<template><PopoverGroup><Popover> <PopoverButton>Product</PopoverButton> <PopoverPanel> <!-- ... --> </PopoverPanel> </Popover> <Popover> <PopoverButton>Solutions</PopoverButton> <PopoverPanel> <!-- ... --> </PopoverPanel> </Popover></PopoverGroup></template> <script setup> import { PopoverGroup, Popover, PopoverButton, PopoverPanel, } from '@headlessui/vue' </script>
Popover and its subcomponents each render a default element that is sensible for that component: the Popover, Overlay, Panel and Group components all render a <div>, and the Button component renders a <button>.
This is easy to change using the as prop, which exists on every component.
<template> <!-- Render a `nav` instead of a `div` --><Popover as="nav"><PopoverButton>Solutions</PopoverButton> <!-- Render a `form` instead of a `div` --><PopoverPanel as="form"><!-- ... --></PopoverPanel></Popover> </template> <script setup> import { Popover, PopoverButton, PopoverPanel } from '@headlessui/vue' </script>
Pressing Tab on an open panel will focus the first focusable element within the panel's contents. If a PopoverGroup is being used, Tab cycles from the end of an open panel's content to the next Popover's button.
Clicking a PopoverButton toggles a panel open and closed. Clicking anywhere outside of an open panel will close that panel.
| Command | Description |
Enter or Spacewhen a | Toggle panel |
Esc | Closes any open Popovers |
Tab | Cycle through an open panel's contents Tabbing out of an open panel will close that panel, and tabbing from one open panel to a sibling Popover's button (within a PopoverGroup) closes the first panel |
Shift + Tab | Cycle backwards through the focus order |
Nested Popovers are supported, and all panels will close correctly whenever the root panel is closed.
All relevant ARIA attributes are automatically managed.
Here's how Popovers compare to other similar components:
-
<Menu />. Popovers are more general-purpose than Menus. Menus only support very restricted content and have specific accessibility semantics. Arrow keys also navigate a Menu's items. Menus are best for UI elements that resemble things like the menus you'd find in the title bar of most operating systems. If your floating panel has images or more markup than simple links, use a Popover. -
<Disclosure />. Disclosures are useful for things that typically reflow the document, like Accordions. Popovers also have extra behavior on top of Disclosures: they render overlays, and are closed when the user either clicks the overlay (by clicking outside of the Popover's content) or presses the escape key. If your UI element needs this behavior, use a Popover instead of a Disclosure. -
<Dialog />. Dialogs are meant to grab the user's full attention. They typically render a floating panel in the center of the screen, and use a backdrop to dim the rest of the application's contents. They also capture focus and prevent tabbing away from the Dialog's contents until the Dialog is dismissed. Popovers are more contextual, and are usually positioned near the element that triggered them.
The main Popover component.
| Prop | Default | Description |
as | div | String | ComponentThe element or component the |
| Slot Prop | Description |
open |
Whether or not the popover is open. |
close |
Closes the popover and refocuses |
This can be used to create an overlay for your Popover component. Clicking on the overlay will close the Popover.
| Prop | Default | Description |
as | div | String | ComponentThe element or component the |
| Slot Prop | Description |
open |
Whether or not the popover is open. |
This is the trigger component to toggle a Popover. You can also use this
PopoverButton component inside a PopoverPanel, if you do so, then it will
behave as a close button. We will also make sure to provide the correct
aria-* attributes onto the button.
| Prop | Default | Description |
as | button | String | ComponentThe element or component the |
| Slot Prop | Description |
open |
Whether or not the popover is open. |
| Prop | Default | Description |
as | div | String | ComponentThe element or component the |
focus | false | BooleanThis will force focus inside the |
static | false | BooleanWhether the element should ignore the internally managed open/closed state. Note: |
unmount | true | BooleanWhether the element should be unmounted or hidden based on the open/closed state. Note: |
| Slot Prop | Description |
open |
Whether or not the popover is open. |
close |
Closes the popover and refocuses |
Link related sibling popovers by wrapping them in a PopoverGroup. Tabbing out of one PopoverPanel will focus the next popover's PopoverButton, and tabbing outside of the PopoverGroup completely will close all popovers inside the group.
| Prop | Default | Description |
as | div | String | ComponentThe element or component the |
If you're interested in predesigned component examples using Headless UI and Tailwind CSS, check out Tailwind UI — a collection of beautifully designed and expertly crafted components built by us.
It's a great way to support our work on open-source projects like this and makes it possible for us to improve them and keep them well-maintained.